Build a WordPress Events System with ACF and Advanced Views
Key Points at a Glance
- Building a structured events system in WordPress
- Structuring event data with Advanced Custom Fields
- Understanding the Advanced Views architecture
- Creating reusable event layouts
- Querying and displaying upcoming events
- Grouping events by month
- Why this approach simplifies long-term maintenance
Table of Contents
Almost every website eventually needs events.
Workshops.
Webinars.
Meetups.
Launches.
Community gatherings.
At first it sounds simple: “just show upcoming events on the website.”
But once you start implementing it, the requirements quickly become clear:
- Events should appear in chronological order
- Past events should disappear automatically
- Editors should easily add dates, locations, and RSVP links
- Developers should maintain full control of the markup
- The system should remain lightweight and maintainable
Many event plugins try to solve this with massive feature sets.
But often that creates a different problem:
too much complexity for what should be simple structured content.
A cleaner approach is to build an event system using:
This gives you a structured, maintainable setup where:
- editors manage events like normal posts
- templates remain fully customizable
- queries stay predictable and transparent
- layouts are reusable across the site
In this guide we’ll walk through a practical implementation.
We’ll build:
- an Event Custom Post Type
- structured ACF event fields
- a reusable Advanced Views Layout
- a Post Selection that retrieves upcoming events
- automatic filtering of past events
- a calendar-style layout using Twig
Along the way we’ll highlight why this architecture keeps WordPress maintainable long-term.
Understanding the Advanced Views Architecture
Before building anything, it’s important to understand the philosophy behind Advanced Views.
The plugin separates data querying from presentation.
Two main components make this possible.
Layouts
A Layout defines how a single item is rendered.
Think of it as a template for a single post.
For example, an event layout might display:
- title
- date
- description
- location
- RSVP link
Layouts do not query the database.
They simply describe how data should appear.
Because of this separation, layouts become reusable building blocks.
You might reuse the same event layout in:
- an upcoming events section
- a homepage widget
- a category page
This reduces duplication and keeps templates consistent across the site.
Post Selections
A Post Selection handles the query.
Under the hood it builds a WP_Query, but the interface makes it far easier to configure:
- post types
- meta filters
- sorting
- taxonomy filters
- pagination
A Post Selection then loops through the results and renders them using a Layout.
The architecture looks like this:
Post Selection (query rules)
        ↓
Loop through posts
        ↓
Layout (display structure)
This separation is powerful.
When queries and layouts are independent:
- layouts stay reusable
- queries stay easy to modify
- maintenance becomes significantly easier
For event systems in particular, this architecture works extremely well.
Step 1 — Creating the Event Post Type
The first step is defining a content model.
Events should not be regular posts.
They deserve their own Custom Post Type.
Example:
function register_event_post_type() {register_post_type('event', [
'label' => 'Events',
'public' => true,
'has_archive' => true,
'rewrite' => ['slug' => 'events'],
'menu_icon' => 'dashicons-calendar-alt',
'supports' => ['title','editor','thumbnail']
]);}add_action('init','register_event_post_type');
Of course there is also the option in ACF to create custom post types.
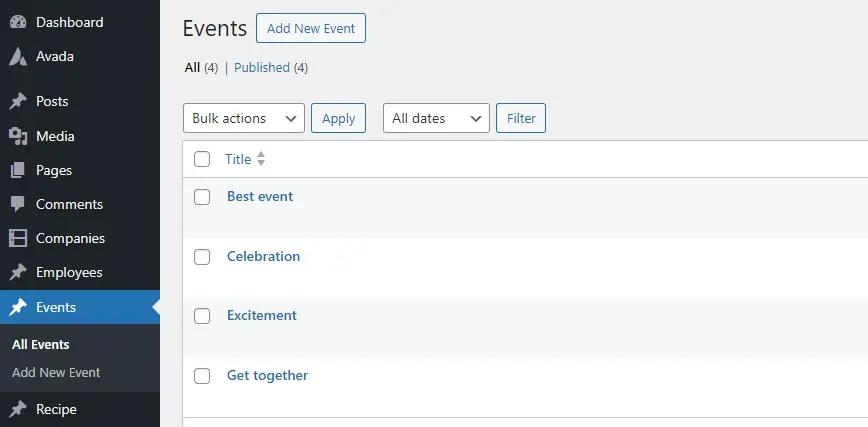
Now editors have a dedicated Events section in the dashboard.
Each post represents one event.
Step 2 — Structuring Event Data with ACF
Events have structured information that shouldn't live inside the post content.
We want clear fields for things like:
- start date
- end date
- venue
- RSVP link
Create an ACF Field Group assigned to the Event post type.
Recommended fields:
| Field | Type | Purpose |
|---|---|---|
| Start Date | Date/Time Picker | Primary event date |
| Start Time | Time Picker | When the event begins |
| End Date | Date/Time Picker | Event end time |
| Venue Name | Text | Location |
| Venue Address | Text | Address |
| City | Text | City location |
| Organizer | Text | Event host |
| RSVP Required | True/False | Registration toggle |
| RSVP Link | URL | Registration page |
| Ticket Price | Number | Optional pricing |
| External Event Link | URL | Full event page |
The most important field is:
start_date
This field drives the entire system.
We will use it to:
- sort events chronologically
- hide past events
- group events by month

Step 3 — Creating the Event Layout
Next we create the Layout that will render each event.
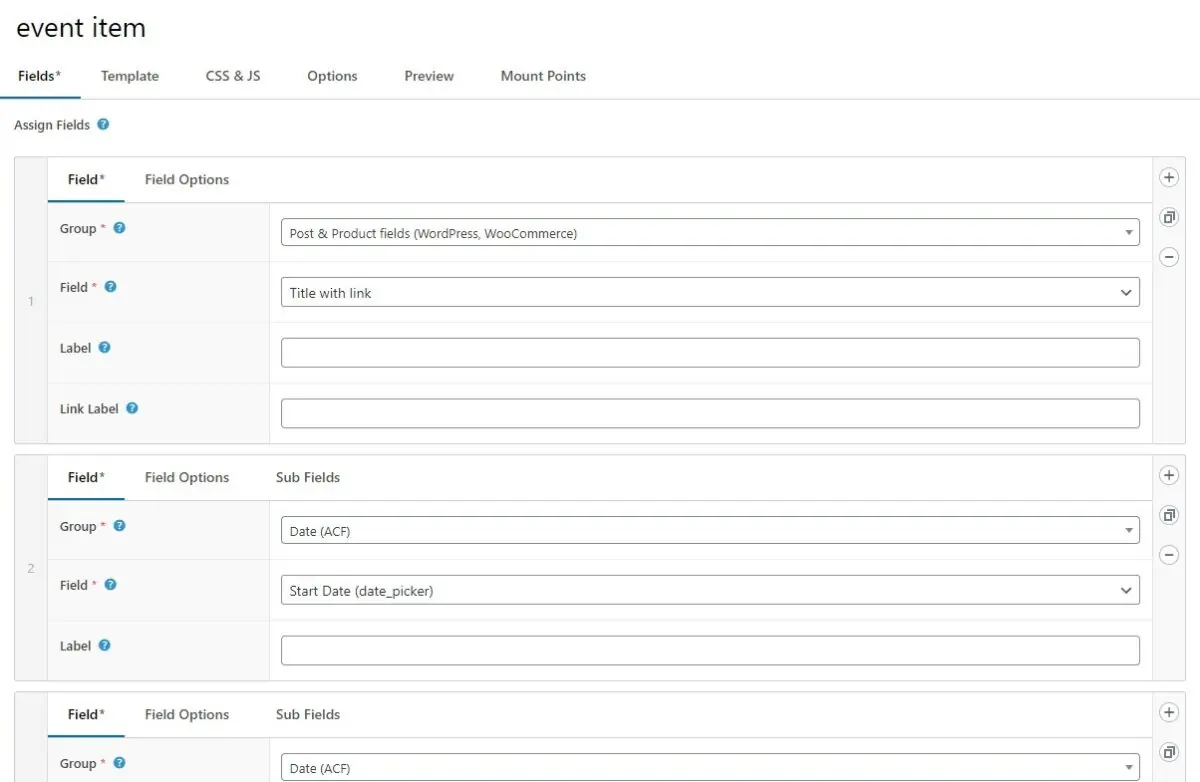
Inside Advanced Views → Layouts, create a new layout.
Add the fields you want available in the template:
- Post Title
- Start Date
- End Date
- Venue
- RSVP Link
Once saved, Advanced Views generates a starter Twig template.
Example twig:
<acf-view-69bd22d4932cc class="{{ _view.classes }}acf-view acf-view--id--{{ _view.id }} acf-view--object-id--{{ _view.object_id }}">

	{% if post_title_link.value %}
		<a target="{{ post_title_link.target }}" class="acf-view__post-title-link" href="{{ post_title_link.value }}">
			{{ post_title_link.linkLabel|default(post_title_link.title) }}
		</a>
	{% endif %}


	{% if start_date.value %}
		<p class="acf-view__start-date">
			{{ start_date.value }}
		</p>
	{% endif %}


	{% if end_date.value %}
		<p class="acf-view__end-date">
			{{ end_date.value }}
		</p>
	{% endif %}


	{% if event_venue.value %}
		<p class="acf-view__event-venue">
			{{ event_venue.value }}
		</p>
	{% endif %}


	{% if rsvp_link.value %}
		<a target="{{ rsvp_link.target }}" class="acf-view__rsvp-link" href="{{ rsvp_link.value }}">
			{{ rsvp_link.linkLabel|default(rsvp_link.title) }}
		</a>
	{% endif %}

</acf-view-69bd22d4932cc>
This layout now defines how an event post appears when the shortcode is used. We ignore the shortcode for now, we'll use it in a Post Selection.
Because it’s reusable, any improvements to the layout will automatically apply wherever it’s used.
This dramatically simplifies long-term maintenance.
Step 4 — Creating the Post Selection
Now we create the query that retrieves events.
Go to Advanced Views → Post Selections and create a new one.
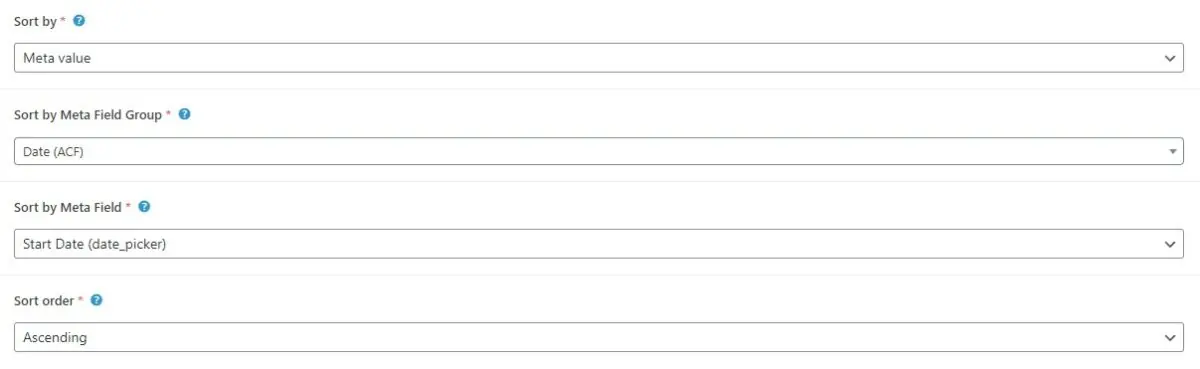
Choose your event layout as the Item Layout, and choose Post Type 'event' to filter posts by that type.
For Sort by choose 'Meta value', Sort by Meta Field Group 'Date (ACF)' this is your start date/time field. Then Sort order 'ascending'. This ensures the next upcoming event appears first.
Step 5 — Automatically Hiding Past Events
Note: You'll need Advanced Views Pro to use the Meta Filter feature.
One of the best parts of using structured event data is automation.
Instead of manually removing old events, we simply filter them out.
Add a meta filter:
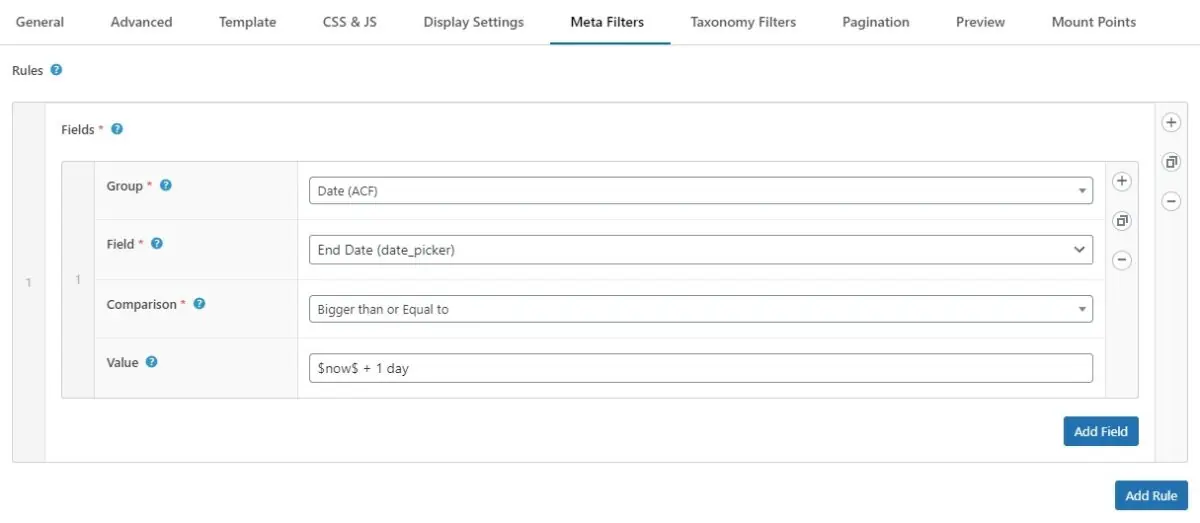
This ensures only events today or later appear in the results.
Site Editors can keep past events in the database while visitors only see the relevant upcoming ones.
Maintenance becomes effortless.
Step 6 — Rendering the Post Selection
Once your Post Selection is configured, you can render it anywhere.
Advanced Views provides a shortcode.
Example:
[avf-post-selection name="events list" id="69bd268a3edda"]
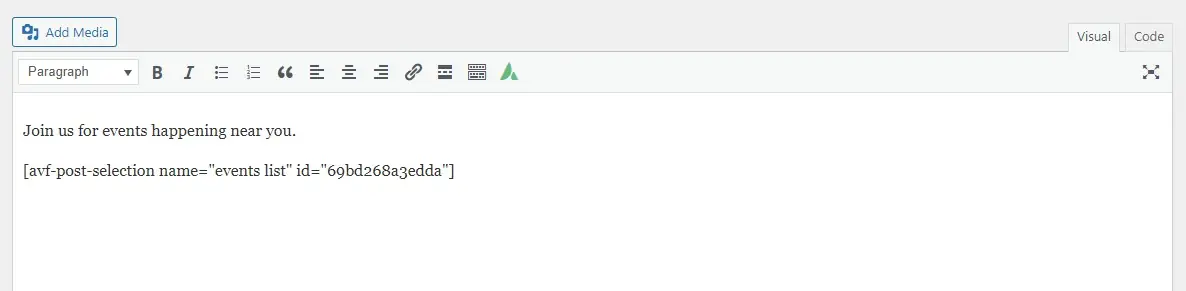
Let's have a look at the result.

Step 7 — Grouping Events by Month
Skip this step if you don't want grouping by month.
For this again you'll need Advanced Views Pro as it makes use of the Custom Data file.
For sites with many events, grouping them by month improves readability.
Instead of a long chronological list, events are organized like this:
June 2026
  Event A
  Event B
July 2026
  Event C
  Event D
We can achieve this by including the Custom Data and modifying the Post Selection template.
First go to the Advanced tab in your Post Selection. Insert the function snippet below. Replace your field name for "date". In my case it'll be 'start_date'.
<?php

use Org\Wplake\Advanced_Views\Pro\Bridge\Cards\Custom_Card_Data;

return new class extends Custom_Card_Data {
    public function get_variables(): array
    {
        $post_ids = $this->get_default_variables()["_card"]['post_ids'] ?? [];
        $grouped_items = [];

        foreach ($post_ids as $post_id) {

            // declare the field to group by
            $raw_date = get_field('start_date', $post_id); // ACF date field

            // convert to month string
            $month = "";
            if ($raw_date) {
                $timestamp = strtotime($raw_date);
                $month = $timestamp ? date('F Y', $timestamp) : 'No Date';
            } else {
                $month = 'No Date';
            }

            // initialize group if not exists
            if (!key_exists($month, $grouped_items)) {
                $grouped_items[$month] = [];
            }

            // add post to group
            $grouped_items[$month][] = $post_id;
        }

        return [
            "grouped_items" => $grouped_items,
        ];
    }
};
This technique detects when the month changes and inserts a heading automatically.
Why This Architecture Works So Well
By separating queries from layouts, Advanced Views creates a system that is:
Maintainable
Layouts can be updated once and reused everywhere.
Flexible
Post Selections can change without touching templates.
Lightweight
No heavy event plugin required.
Editor Friendly
Events behave like normal posts.
Developer Friendly
Full control over queries and markup.
This balance is what makes Advanced Views especially powerful for structured content like events.
Final Thoughts
An event system seems simple on the surface.
But when implemented correctly, it should:
- be easy for editors
- be flexible for developers
- remain maintainable long-term
Using:
- Custom Post Types
- Advanced Custom Fields
- Advanced Views
creates a clean architecture where data, queries, and presentation stay properly separated.
The result is a system that scales naturally as your site grows.
And just as importantly, it remains easy to maintain months or years later.
Thank you for reading! to our monthly newsletter to stay updated on the latest WordPress news and useful tips.

Stuck with development or facing an issue?
WPLake offers affordable on-demand website development and design.
No matter the size of your project - contact us now, and we'll get it done for you!
Frequently Asked Questions Test Your Knowledge
FAQ mode
/
Learning mode
- What is the best way to create events in WordPress?
The best approach is to create a Custom Post Type for events, store event details using ACF fields, and display them using a flexible query and layout system like Advanced Views.
- How do I show upcoming events in WordPress?
You can filter events using a meta filter (Pro) that only returns events where the event date is greater than or equal to the current date. This automatically hides past events.
- Why use Advanced Views for event listings?
Advanced Views separates queries (Post Selections) from display templates (Layouts). This makes event systems easier to maintain, more flexible, and simpler to expand.
- How can events be grouped by month in WordPress?
Using Twig logic in an Advanced Views template, you can detect when the month changes and insert month headings automatically while looping through events.
- Do past events need to be deleted?
No. Past events can remain in the database while meta filters ensure that only upcoming events appear on the public website.
Related articles

Lesson #2
Time to read: 11 mins
Updated 25 Sep, 2024
Content links (4)
About the Author