ACF Flexible Content Field: Complete Guide with Code Snippets

Key Points at a Glance
- Field Structure: The ACF Flexible Content field acts as a container for customizable layouts, which are field groups with no fixed structure. It allows grouping multiple ACF fields and repeating them in any order.
- Comparison with Repeater and ACF Blocks: Unlike the Repeater field, which is best for lists of similar items, the Flexible Content field allows for more varied and complex layouts. ACF Blocks offer a way to build reusable, block-based components in the block editor, but they require a more structured approach than the Flexible Content field.
- Storage Format: Flexible Content data is stored similarly to repeater fields, with each field in its own database row. This can impact performance, especially with many layouts.
- Supported Locations: The field can be used across various content types, including posts, pages, user profiles, taxonomy terms, and options pages, with data stored in appropriate tables (e.g., wp_postmeta, wp_usermeta).
- Integration with Builders: Support for themes and builders varies. Some builders like Beaver Builder and Bricks support ACF Flexible Content, while others may not.
- Displaying Layouts: Use Advanced Views to dynamically show Flexible Content layouts or use get_field() with acf_fc_layout to loop through and display each layout type.
Table of Contents
The ACF Flexible Content field is an advanced feature within the Advanced Custom Fields plugin, categorized under the Layout group. Unlike traditional field types, the Flexible Content field offers a unique, highly customizable editing experience that sets it apart from both the Gutenberg and Classic editors.
Each flexible content field acts as a container for layouts, which are essentially field groups, but with no fixed structure or required items. Think of it as a more powerful version of the ACF Repeater field, allowing you to group multiple ACF fields and repeat them in any order.
This flexibility enables content editors to create custom page layouts using any of the pre-configured layouts, giving them the freedom to design pages exactly how they want - without the restrictions of a rigid template.
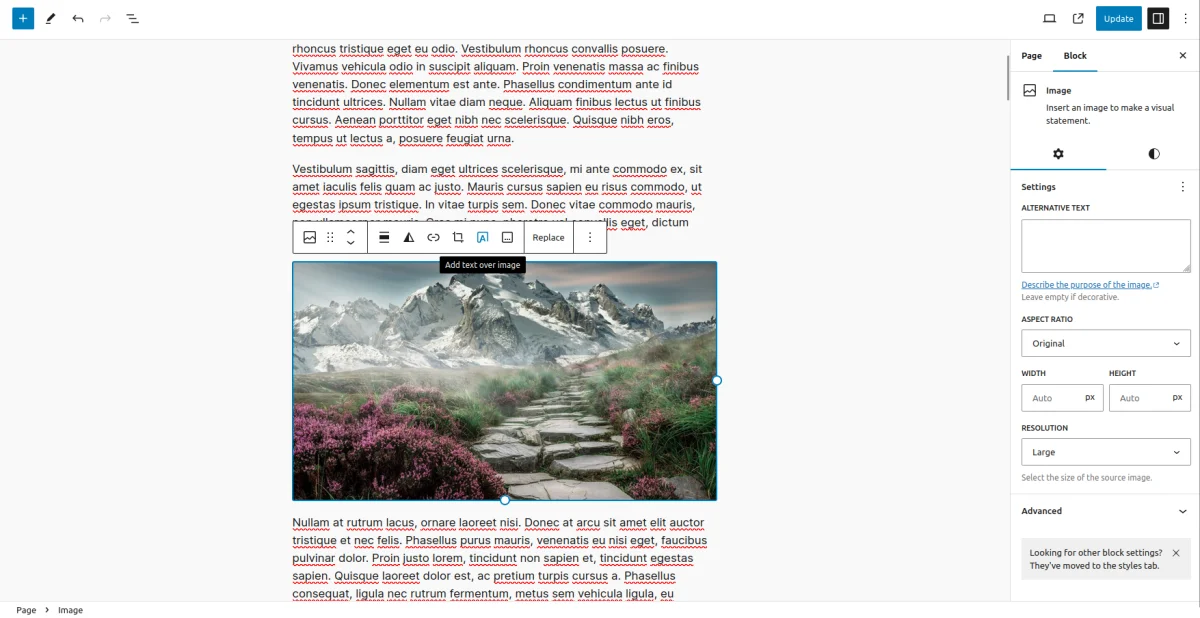
ACF Flexible Content Field UI
ACF Clone field-related addons
ACF addons can be an important part of the workflow, and there are several addons especially useful for the ACF Clone field:
- Flexible Content Extended enhances the Flexible Content field by replacing the standard layout list with a modal interface that includes image previews.
- ACF to Custom Database Tables is an add-on for Advanced Custom Fields that saves your custom field data in a dedicated, structured database table, improving organization and performance.
- ACF Tooltip enhances the user experience by managing lengthy instruction texts in ACF fields. Instead of cluttering the edit screen, this plugin allows you to add tooltips to field labels, keeping the interface clean and space-efficient.
- WPGraphQL for ACF allows you to expose ACF fields and field groups to GraphQL, enabling seamless querying of ACF data within your GraphQL queries.
1. ACF Flexible Content field essentials
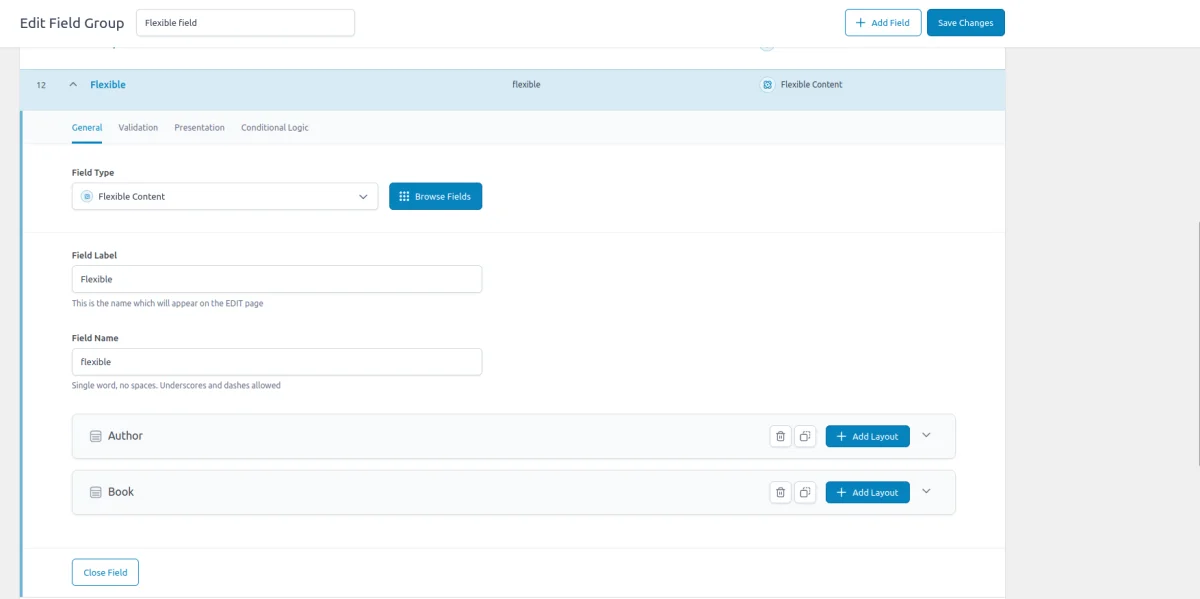
1.1) Field settings
In addition to the typical field name and label settings, the ACF Flexible Content field offers several advanced configurations to control its behavior.
General tab - layouts
Under the General tab, you define the layouts that will be available for selection. Each layout is essentially a container for other ACF fields, allowing you to build reusable content structures.
- Add Layouts:
Here, you can create multiple layouts, each containing a unique combination of fields. These layouts can include any ACF field type, such as text, images, galleries, or even nested repeaters and other flexible content fields. - Layout Name & Label:
For each layout, you'll specify a name (used internally) and a label (visible to editors in the admin panel).
Presentation tab
The Presentation tab provides control over how the Flexible Content field will behave and appear on the admin side.
- Minimum Layouts:
This setting allows you to define the minimum number of layouts required for the field. For example, if you want to ensure the user adds at least one layout, you can set this value to "1." - Maximum Layouts:
Similarly, this option lets you set a limit on the number of layouts that can be added. If you only want users to choose a limited number of content blocks, you can restrict it with this setting. - Button Label:
The button label is what users will click to add new layouts. By default, it says "Add Row," but you can customize this to something more meaningful, such as "Add Content Block" or "Add Section", depending on your layout's context.
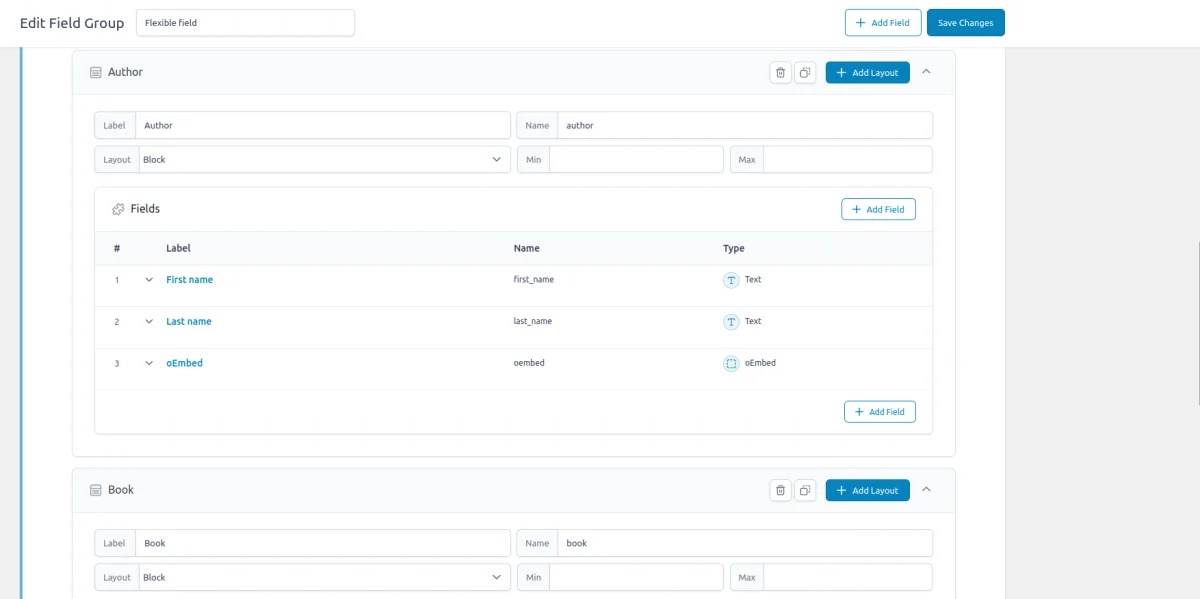
1.2) Storage format
Let's take a look at how the Flexible field stores field values inside the database.
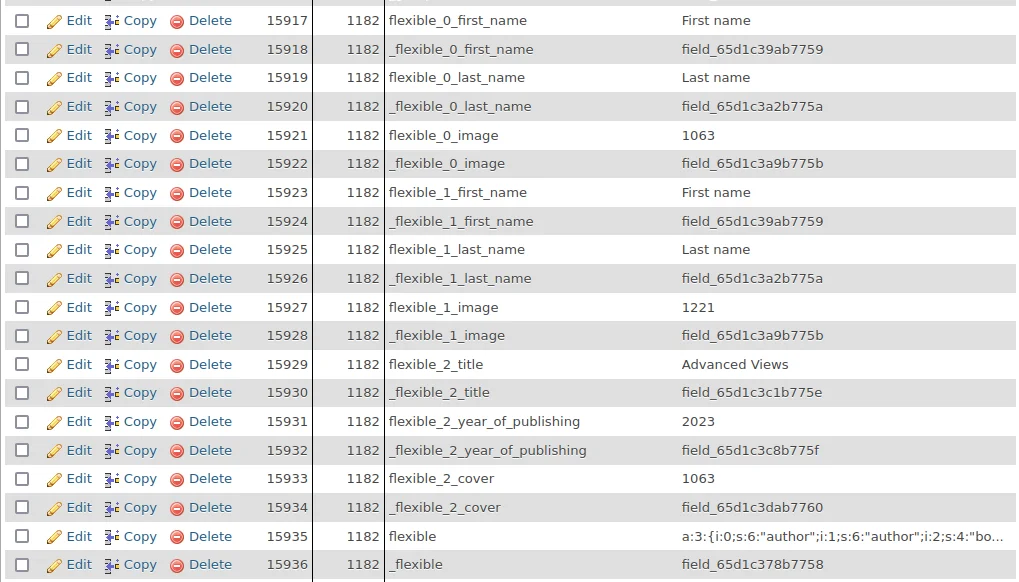
If you're familiar with the repeater field, you'll notice that the structure is the same. So our flexible field has the name 'flexible', and our 'author' layout includes the 'first_name' and 'last_name' fields. ACF writes each field to the meta table, adding an integer index to reflect the layout.
You shouldn't worry about this index, as it's a dynamic value. When editors reorder items, the index changes, and the items are overridden.
flexible_0_first_name = {flexible-name}_{layout-index}_{field-name}This structure—where each value is stored in its own database row—comes with both advantages and drawbacks.
On the positive side, it allows for efficient database queries, making it easier to locate specific values across all entries. This can be particularly useful when filtering or searching for content that matches certain criteria.
However, the drawback lies in performance. Storing each value separately can increase the time it takes to load data, especially when dealing with numerous layouts. If your page includes dozens of flexible layouts, this additional load time can become more noticeable and impact the overall performance.
1.3) Supported field locations
A great feature of the ACF Flexible Content field is its versatility - it's not limited to just pages or posts. You can use it across various locations, including user profiles and options pages.
This means you can add a "content editor" to every user profile, giving editors control over layout customization. By default, user archive layouts are hard-coded, but with Flexible Content, you can break away from that limitation, allowing dynamic layouts for user profiles.
Regardless of where it’s applied, the Flexible Content field stores data consistently across various content types:
- Post Objects (Posts, Pages, Media Attachments, Custom Post Types, WooCommerce Products):
All content types - posts, pages, media attachments, and custom post types (CPT) - are stored in the wp_posts table. The Flexible Content field’s data is stored in the wp_postmeta table, linked to the corresponding post or CPT item. - Options Pages:
Flexible Content can also be used on ACF Options Pages, with its data stored in the wp_options table. This allows the data to act as a global site-wide setting, making it ideal for reusable content like site-wide banners or global configurations. - User Profiles:
When Flexible Content is added to user profiles, its data is stored in the wp_usermeta table and linked to the corresponding user. This is particularly useful for creating custom layouts or sections within user profiles, adding flexibility to a traditionally rigid structure. - Terms (e.g., Post Categories and Tags):
Flexible Content can be attached to terms, such as categories, tags, or custom taxonomies. In this case, its data is stored in the wp_termmeta table and associated with the specific term, allowing for custom layouts or data to be added to taxonomies. - ACF Gutenberg Block:
You can also use the Flexible Content field within custom ACF Gutenberg blocks. When applied this way, the field’s data is stored in the post_content as part of the block's JSON structure in the wp_posts table. This allows the flexible layouts to be part of the content, embedded within the block itself.
2. Flexible Content field alternatives
2.1) Flexible Content field vs. Repeater field
The ACF Flexible Content field lives up to its name by offering editors a high degree of flexibility, allowing them to build complex layouts with various field combinations. However, there are situations where a more structured, predefined setup is preferred. In such cases, the ACF Repeater field might be a better fit.
The Repeater field also supports multiple rows within a single field, but unlike Flexible Content, it enforces a fixed set of fields for each row. This makes it ideal when you want to ensure consistency in the data structure, such as when creating lists, tables, or repeating sections where the content format should stay uniform across entries.
2.2) Flexible Content field vs. Gutenberg editor
The Flexible field appears in meta boxes just like other field types and stores values. What sets this field type apart is its functionality akin to a page builder, offering an alternative to the Gutenberg editor.
If you recall the behavior of the Gutenberg editor, you'll notice it functions as a block editor, enabling the composition of pages from blocks ranging from small elements like paragraphs to larger multi-part sections like galleries.
Gutenberg aims to transcend traditional editing by providing styling opportunities such as grouping blocks, selecting row or stack layouts, and adjusting other layout settings like image size. This variance in editor behavior distinguishes it from the previous Classic Editor, which primarily focused on content edits.
The fact that Gutenberg is no longer solely an editor is one of the reasons why many in the WordPress community have reservations about it. When building websites for clients using ACF fields for data, concerns about layout and styling arise, with clients potentially becoming confused by layout features.
To address this, the Flexible field offers a pure editing experience, ensuring editors remain focused on content creation without distractions from styling features. Another solution can be utilizing the ACF Blocks feature to create independent blocks that cannot be customized via Gutenberg.
2.3) Flexible Content field vs. ACF Blocks
Nothing is perfect, and the fact that using the postmeta table enables queries by fields brings performance considerations. Both Gutenberg native and ACF Blocks store all the field values inside the post_content, which eliminates the need for extra queries to the database to retrieve them.
The Flexible field stores every field separately, resulting in numerous extra queries to the database. If you've previously been using the classic 'meta field boxes' approach with plain repeaters, then the performance will remain the same.
However, compared to ACF Blocks, the difference will be significant. So, if performance is crucial for your project, we recommend using ACF Blocks.
3. Use cases of the ACF Flexible Content Field
The ACF Flexible Content field is incredibly versatile, making it a great alternative to both the Gutenberg and Classic editors. One of its standout features is the ability to be added to any screen—not just posts and pages, but also user profiles, taxonomy terms, and even option pages.
Here are some real-life use cases:
3.1) Building dynamic page layouts
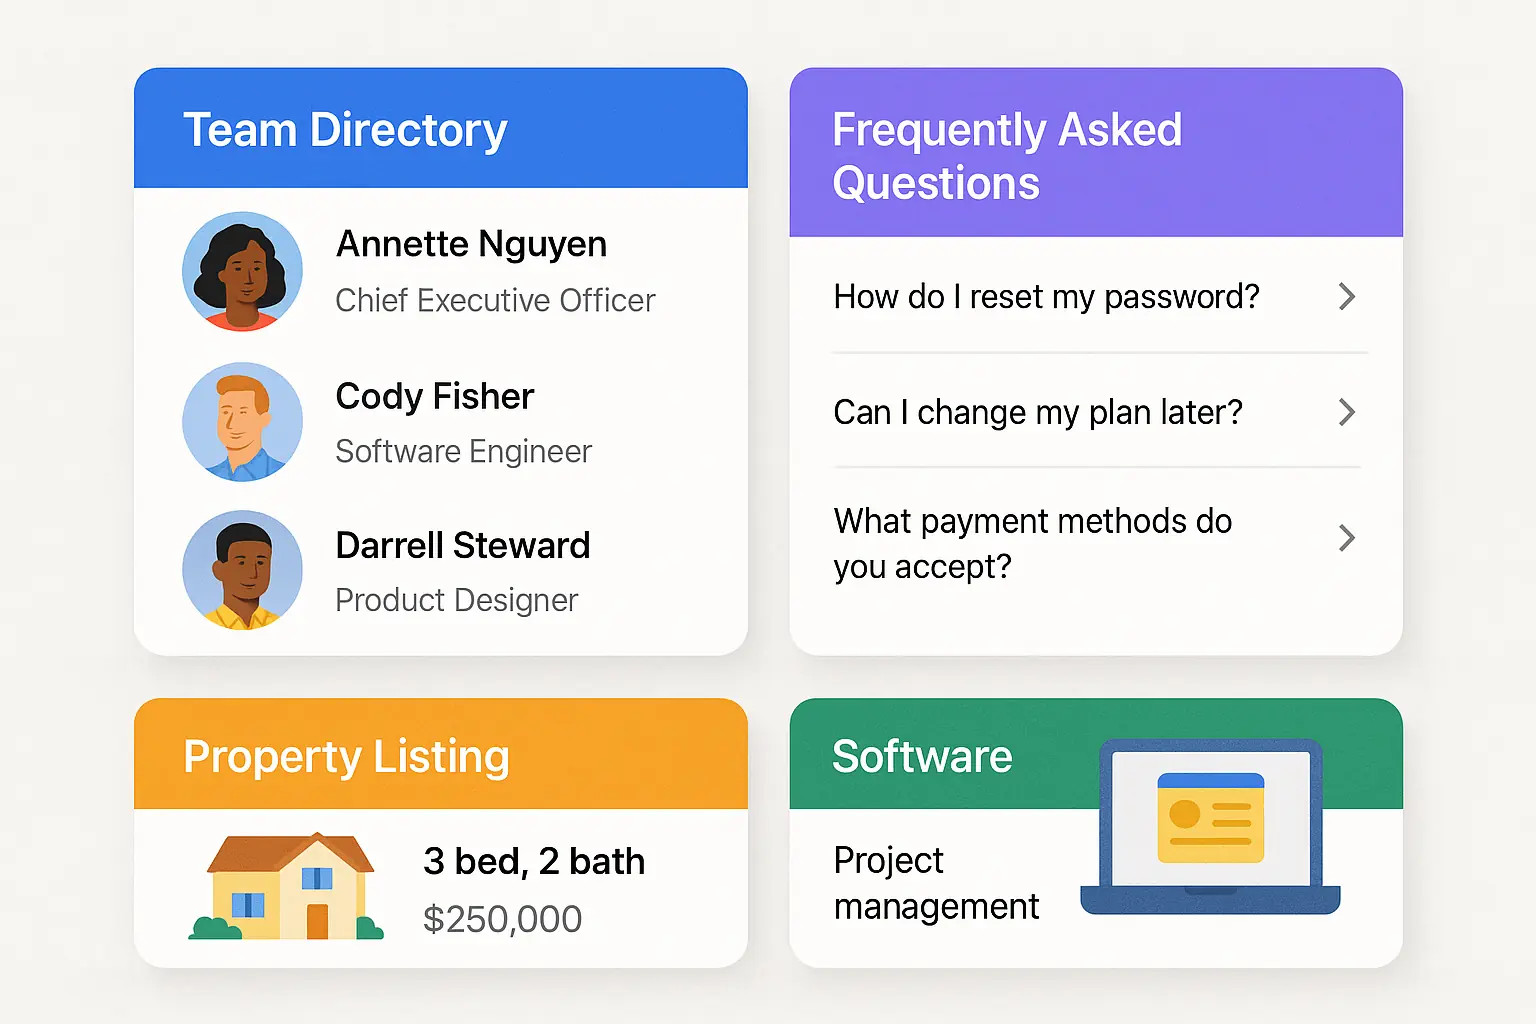
Flexible Content is ideal for building pages with varied layouts. Instead of relying on rigid page templates, editors can choose from predefined content blocks (such as hero banners, image galleries, testimonials, and more) to build dynamic, unique pages. For instance, a marketing team could use it to create new landing pages with different layouts based on campaign needs, all without needing developer intervention.
3.2) Customizing user profile layouts
With the Flexible Content field, you can break free from the limitations of default user profile layouts. For example, a membership site could allow users to create custom profiles, adding elements like biography sections, photo galleries, and social media links in any order.
3.3) Creating custom product pages in WooCommerce
For eCommerce sites, the Flexible Content field allows product pages to be more than just product descriptions. You can add custom sections like customer testimonials, product videos, or detailed specifications, all while giving editors control over the order and appearance of these sections.
3.4) Custom layouts for taxonomy terms
Another powerful use case is customizing layouts for taxonomy terms like categories or tags. For example, in a news website, editors could use Flexible Content to create custom layouts for different news categories, each with its own featured articles, videos, and sub-sections.
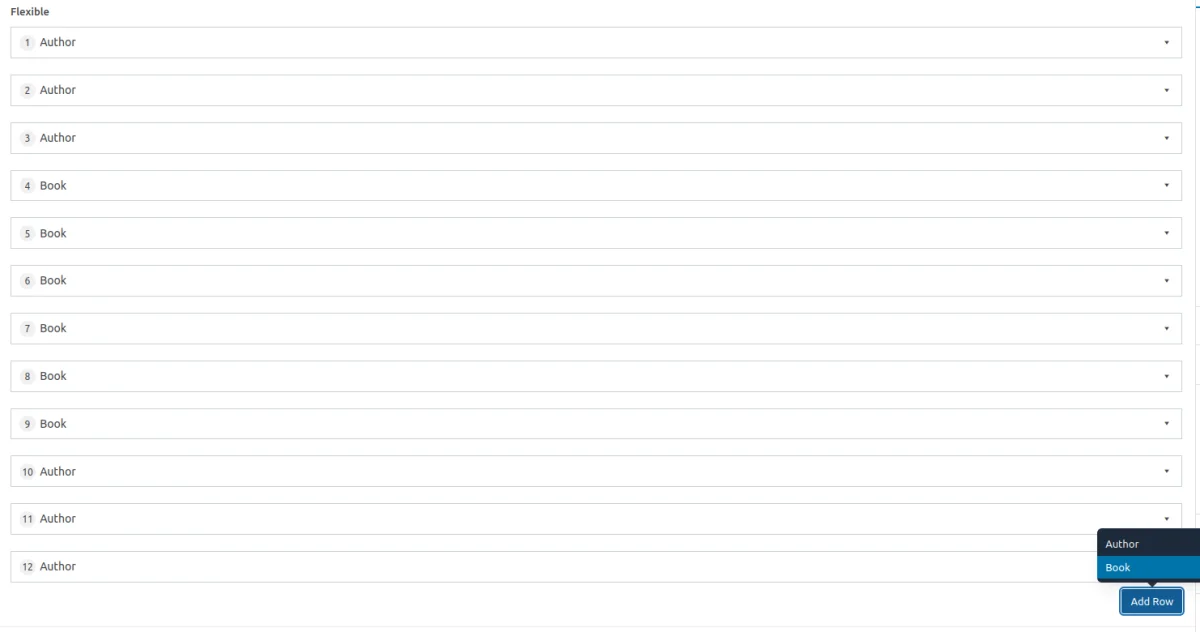
4. How to manage Flexible Content rows in the UI
Managing flexible content rows in the ACF is straightforward:
- Add a Row:
To add a new row, click the "Add Row" button located beneath the flexible content field table. - Remove a Row:
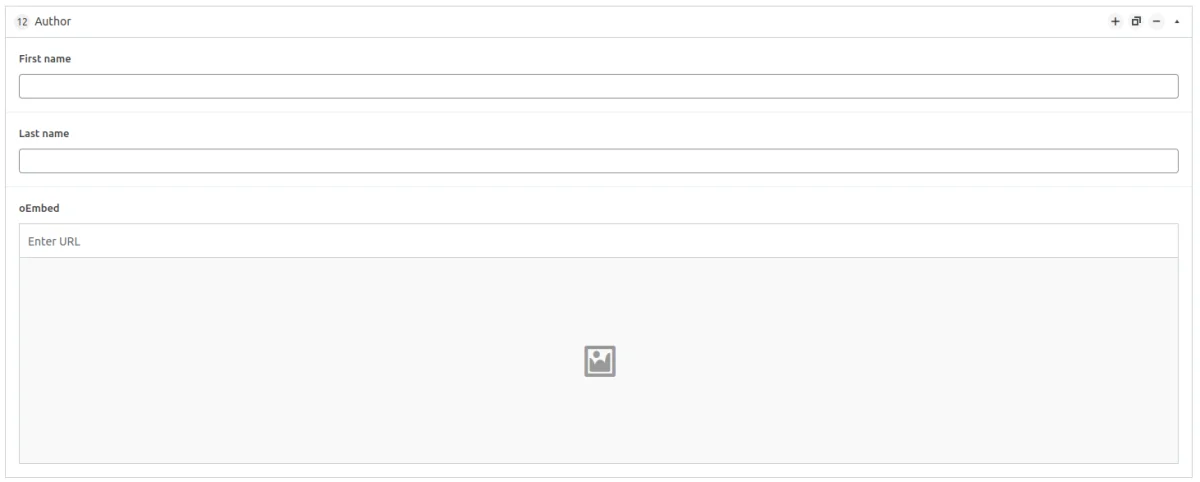
To remove a row, hover over the row you wish to delete. A minus icon ("-") will appear on the row. Click this icon to remove the row. - Clone a Row:
If you want to duplicate a row, hover over the target row and click the duplicate icon that appears. This will create an exact copy of the selected row, including all of its fields and content. - Reorder Rows:
To reorder rows, hover over the row you want to move. When the cursor changes to a drag icon (a crosshair or hand), click and drag the row to its new position. - Insert a Row Below a Specific Row:
If you want to add a new row directly below a specific row, hover over the desired row and click the plus icon ("+") that appears. This will insert a new empty row immediately beneath the selected row.
5. ACF Flexible Content field support in Themes and Builders
ACF is one of the most popular WordPress plugins, and it's supported by many page builders right out of the box. However, most of these integrations are basic, providing limited control over the layout.
To achieve universal compatibility with any theme and page builder while gaining advanced control over your layout, consider using the Advanced Views Framework or custom code snippets as discussed in the following chapter.
Here's a snapshot of the built-in features offered by some of the most popular WordPress themes and page builders for displaying ACF Flexible Content fields:
| Theme/Builder | ACF-related feature | ACF Flexible Content type support |
|---|---|---|
| Astra | - | no |
| Avada | Dynamic Content | no (not declared) |
| Beaver | ACF Module | yes |
| Bricks | Dynamic data | yes |
| Divi | ACF Module | no (not declared) |
| Elementor | Dynamic Tags | no (not declared) |
| GeneratePress | - | no |
| Gutenberg | - | no |
| Kadence | Dynamic Content | no (not declared) |
| OceanWP | - | no |
| Visual Composer | Dynamic Content | no (not declared) |
| WPBackery | - | no |
While this list may seem brief, many themes come with their own page builders. Check your theme’s documentation for guidance on displaying ACF Flexible Content fields, or refer to the universal methods outlined below for a more flexible approach.
6. Code snippets for the ACF Flexible Content field
ACF functions and their responses are essentially wrappers around built-in WordPress features. This means that to load and display field values, you need to be familiar not only with ACF but also with core WordPress classes and functions. Additionally, writing markup from scratch and manually escaping data can be time-consuming.
To streamline development, you can use the Advanced Views Framework. This WordPress framework offers smart templates for the front end, simplifying post queries and template creation. It generates default markup and automatically loads the escaped data into the template, allowing you to focus on the layout itself.
Unlike drag-and-drop page builders, smart templates in Advanced Views are modular and based on a template engine (Twig or Blade), providing full control over the markup and helping you avoid the pitfalls of global CSS and JavaScript files. The framework natively supports all ACF field types, along with other data sources.
Note: AVF: Lite edition is free and supports all plain ACF field types, but Flexible Content is a multi-level field, supported only in the AVF: Pro edition. The good news that Pro contains a lot of useful features, including an option for custom Gutenberg blocks, which allows to turn any element into the Gutenberg block without any React coding.
Below are examples for both Advanced Views Pro and custom code:
6.1) Loading and displaying layouts
Using Advanced Views Framework
To display a flexible field, follow the steps mentioned on the AVF Flexible Content Docs:
a) Create a new Layout ('Primary'):
- On the Fields tab, click the 'Add field' button.
- Choose a Flexible Content field.
- After selecting the flexible field, you'll see a new 'Sub-fields' tab appear in the row. Click on it.
- Select all the layouts you want to display.
- Save the current Layout.
b) Create a new Layout ('Internal'):
- On the Fields tab, choose your group in the 'parent group' field.
- In the parent field, select the 'flexible layout' from the previous step.
- Click the 'Add field' button and add all the layout fields you want to display.
- Save the current Layout.
c) Amend the 'Primary' Layout:
- Find the 'flexible' field in the fields list.
- Open the 'Sub-fields' tab and locate the target 'layout'.
- Fill out the "View" setting by choosing the 'Internal' Layout.
- Save the current Layout.
You're done! Now you can copy the generated shortcode of the 'Primary' Layout and paste it to the target page or use the Custom Gutenberg block option.
The great news is that AVF automatically picks up the field data, including the return format, and loads it into the template, allowing you to focus on the layout itself. To style the output, you can add any CSS rules to the CSS code field of your Layout, and AVF will automatically load this CSS on the target pages.
Loading from different locations: To load a field from different locations (e.g., user profile), use the object-id shortcode argument.
In case you need to display all the items in a single row, you can use the CSS Flexbox:
#view__flexible-content {
display: flex;
gap: 10px;
}
To display all the items as a grid, you can use the CSS Grid:
#view__flexible-content {
 display: grid;
 grid-template-columns: 1fr;
 gap: 20px;
 }

@media screen and (min-width:992px) {
 #view__flexible-content {
  grid-template-columns: repeat(4, 1fr);
 }
}
Using custom code
To retrieve data from the Flexible Content field, you’ll use the ACF get_field() function. The second argument specifies the source from which to load the value, such as a post, user, or options page.
When working with Flexible Content, you'll need to check the layout name using the value stored under the acf_fc_layout key, which ACF automatically adds to identify each layout.
Keep in mind that the data returned will vary depending on the field type and its settings. For detailed instructions, refer to the documentation for the specific field types you're working with. Additionally, always prioritize security by properly escaping your output, as shown in the example below.
In the following example, we have two layouts: author and book, with fields of types Text, Select, and Link:
$sections = get_field( 'my_flexible_field' ) ?? array(); // from the current post
$sections = get_field( 'my_flexible_field' , 10) ?? array(); // from a specific post by ID
$sections = get_field( 'my_flexible_field', 'option' ) ?? array(); // from the options page
$sections = get_field( 'my_flexible_field', 'user_1' ) ?? array(); // from the user by ID
$sections = get_field( 'my_flexible_field', 'category_2' ) ?? array(); // from the category term with ID 2
$sections = get_field( 'my_flexible_field', 'genre_3' ) ?? array(); // from the custom genre term with ID 3

foreach ( $sections as $section ) {
	switch ( $section['acf_fc_layout'] ) {
		case 'author':
			// text fields
			$first_name = $section['first_name'] ?? '';
			$last_name  = $section['last_name'] ?? '';
			// link field
			$website    = $section['website'] ?? array( 'url' => '', 'title' => '', 'target' => '_self' );

			// Print the link using printf
			printf( '<a href="%s" title="%s" target="%s">%s</a>',
				esc_url( $website['url'] ),
				esc_html( $website['title'] ),
				esc_attr( $website['target'] ),
				esc_html( $website['title'] )
			);

			// TODO: Print your markup or pass the values into your template
			break;
		case 'book':
			// text field
			$title     = $section['title'] ?? '';
			// select field
			$publisher = $section['publisher'] ?? '';

			// TODO: Print your markup or pass the values into your template
			break;
	}
}
Once you’ve added the code to your target template and incorporated the necessary markup for the fields, you can move on to styling. You'll need to add CSS rules to define the appearance of these fields.
There are two main approaches for this: You can either add the styles to a global style.css file, which will affect the entire site, or you can use template-specific assets. The latter approach, adding styles to a template-specific stylesheet is generally preferred. This method allows you to apply styles precisely where needed without affecting other parts of your site.
To display all the items in a single row, you can use the CSS Flexbox:
.flexible-content {
display: flex;
gap: 10px;
}
For displaying all the items as a grid, you can use the CSS Grid:
.flexible-content {
 display: grid;
 grid-template-columns: 1fr;
 gap: 20px;
 }

@media screen and (min-width:992px) {
.flexible-content {
  grid-template-columns: repeat(4, 1fr);
 }
}
6.2) Updating the Flexible Content field programmatically
To update the Flexible Content field programmatically, you should use the ACF update_field() function. Since this field stores items in an array, the data you provide must be formatted as an array of layouts, each including the layout name under the acf_fc_layout key and the corresponding sub-field values.
add_action('acf/init', function() {
    // Define the Flexible Content data
    $flexible_content_data = array(
        array(
            'acf_fc_layout' => 'layout_1', // Replace with your actual layout name
            'sub_field_1'   => 'Value 1',   // Replace with your actual sub-field key and value
            'sub_field_2'   => 'Value 2',   // Replace with your actual sub-field key and value
        ),
        array(
            'acf_fc_layout' => 'layout_2', // Replace with your actual layout name
            'sub_field_1'   => 'Value 3',   // Replace with your actual sub-field key and value
            'sub_field_2'   => 'Value 4',   // Replace with your actual sub-field key and value
        ),
    );

    // Update the Flexible Content field
    update_field('my_flexible_field', $flexible_content_data, 1); // Replace 'my_flexible_field' with your Flexible Content field key, and 1 with the target post ID
});
If you need to update the Flexible Content field on a user or term object, you must add the appropriate prefix, just as shown in the "loading" field value section.
Note: You should call the update_field function inside the acf/init action, or in any hooks that happen later.
7. Querying by the ACF Flexible Content field
The way ACF Flexible Content stores data in the database - using individual rows for each field value - allows you to query any fields, but it requires manual handling.
To query by Flexible Content fields, you'll need to work directly with MySQL queries because WP_Query and other WordPress query builders do not support querying meta fields using LIKE for meta_key comparison. This approach is necessary to query across all Flexible Content rows.
Below we provide examples of how to master MySql queries depending on where the Flexible Content field values are stored. To better understand the used tables and columns, you can read the WordPress database description in the WP Docs.
7.1) By postmeta (Post, Page, Any CPT)
We execute the direct MySql query in WordPress we need to use the global wpdb class. Replace the flexible-name and field-name in the code with the name of your Flexible Content field and target subfield.
global $wpdb;

// Prepare the query
$query = $wpdb->prepare(
	"SELECT post_id
    FROM $wpdb->postmeta
    WHERE meta_key LIKE 'flexible-name_%_field-name'
    AND meta_value = %s",
	'the very first item'
);

// Execute the query. The array will contain the post IDs of the posts where the key is found.
$results = $wpdb->get_col( $query );
7.2) By termmeta (Terms)
The same as by postmeta, but only using termmeta table name from the wpdb class:
global $wpdb;

// Prepare the query
$query = $wpdb->prepare(
	"SELECT term_id
    FROM $wpdb->termmeta
    WHERE meta_key LIKE 'flexible-name_%_field-name'
    AND meta_value = %s",
	'the very first item'
);

// Execute the query. The array will contain the term IDs of the terms where the key is found.
$results = $wpdb->get_col( $query );
7.3) By usermeta (user profile)
In this case, using usermeta of the wpdb class:
global $wpdb;

// Prepare the query
$query = $wpdb->prepare(
	"SELECT user_id
    FROM $wpdb->usermeta
    WHERE meta_key LIKE 'flexible-name_%_field-name'
    AND meta_value = %s",
	'the very first item'
);

// Execute the query. The array will contain the user IDs of the users where the key is found.
$results = $wpdb->get_col( $query );
7.4) Inside ACF Blocks
ACF Blocks save their data as JSON in the post_content. This data cannot be queried directly. However, if you enable the "Save in Meta" feature for ACF Blocks, the field values are also saved in post meta, allowing you to query them similarly to other postmeta fields.
8. Related Flexible Content field filters and hooks
ACF offers a variety of filters and hooks that enable you to modify field data and behavior, extending WordPress's core hooks functionality. You can utilize the standard add_action and add_filter functions to attach custom code to these hooks.
Below are some of the most commonly used hooks along with the ACF Flexible Content field type:
8.1) acf/load_field
The acf/load_field filter allows you to modify the field settings before it is displayed on the editor's screen. This filter is particularly useful for dynamically adjusting the field's configuration, such as setting default values, changing labels, or customizing available options.
add_filter('acf/load_field/name=my_flexible_field', function (array $field): array {
    // Modify the field settings as needed
    $field['instructions'] = 'Please fill out all fields in the flexible content.';

    return $field;
});
8.2) acf/render_field
The acf/render_field action allows you to add custom HTML before or after a field's input on the editor's screen in the WordPress admin. This can be particularly useful for adding custom-styled text, icons, styles, or additional interactive elements to enhance the field's functionality.
add_action('acf/render_field/key=field_123456789abc', function (array $field): void {
    // Custom HTML before the field input
    echo '<div class="my-custom-class">Custom field-related element</div>';
}, 9); // Use priority to control order
Note: By default, the acf/render_field action is triggered after the field input has been printed. If you need to print your HTML before the input, you should set the priority number to 9 or lower in the third argument of the add_action WordPress function.
8.3) acf/validate_value
Use the acf/validate_value filter to validate the values entered into the field. You can ensure that the entered value meets specific criteria:
add_filter('acf/validate_value/name=my_flexible_field', function ($valid, $value, array $field) {
    if (true !== $valid) {
        return $valid; // Skip validation if there is an existing error
    }

    // Custom validation: Ensure each layout row has at least one sub-field value
    foreach ($value as $layout) {
        if (empty($layout['sub_field_1']) && empty($layout['sub_field_2'])) {
            $valid = 'Please fill out at least one sub-field in each layout.';
            break;
        }
    }

    return $valid;
}, 10, 3);
8.4) acf/validate_save_post
The acf/validate_save_post action allows you to perform custom form validations before saving ACF fields. This is particularly useful when you need to validate one field's value based on another field's input or enforce specific rules across multiple fields.
add_action('acf/validate_save_post', function () {
    // Retrieve the values from the $_POST array
    $flexible_1 = $_POST['acf']['field_flexible_id_1'] ?? [];
    $flexible_2 = $_POST['acf']['field_flexible_id_2'] ?? [];

    if (empty($flexible_1) || empty($flexible_2)) {
        return;
    }

    // Check if the number of rows match
    if (count($flexible_1) !== count($flexible_2)) {
        acf_add_validation_error('field_flexible_id_1', 'The number of rows must match.');
        acf_add_validation_error('field_flexible_id_2', 'The number of rows must match.');
    }
});
Tip: To find the field key, navigate to the ACF field group in the WordPress admin. Click on the Screen Options button at the top right corner of the page, then check the Field Keys option. Once enabled, the field keys will be displayed next to each field name in the group.
8.5) acf/save_post
The acf/save_post action is triggered when the current item (page/product/user) is saved. You can use it to perform any additional actions, e.g. updating related data.
add_action('acf/save_post', function ($post_id) {
    // Avoid running on auto-saves or other post types
    if (defined('DOING_AUTOSAVE') && DOING_AUTOSAVE) {
        return;
    }

    // Retrieve the Flexible Content field value
    $flexible_content = get_field('my_flexible_field', $post_id);

    if (!$flexible_content) {
        return;
    }

    // Process each layout in the Flexible Content field
    foreach ($flexible_content as $layout) {
        if ($layout['acf_fc_layout'] === 'specific_layout') { // Replace 'specific_layout' with your layout name
            $related_post_id = $layout['sub_field'] ?? ''; // Replace 'sub_field' with your actual sub-field key

            if (!$related_post_id) {
                continue;
            }

            // Fetch the current related items for the related post
            $related_items = get_field('related_items', $related_post_id) ?? [];

            // Add the current post ID to the related items array if not already present
            if (!in_array($post_id, $related_items, true)) {
                $related_items[] = $post_id;
            }

            // Update the related items field with the new array
            update_field('related_items', $related_items, $related_post_id);
        }
    }
});
Thank you for reading! to our monthly newsletter to stay updated on the latest WordPress news and useful tips.

Stuck with development or facing an issue?
WPLake offers affordable on-demand website development and design.
No matter the size of your project - contact us now, and we'll get it done for you!
Related articles
Content links (68)
About the Author